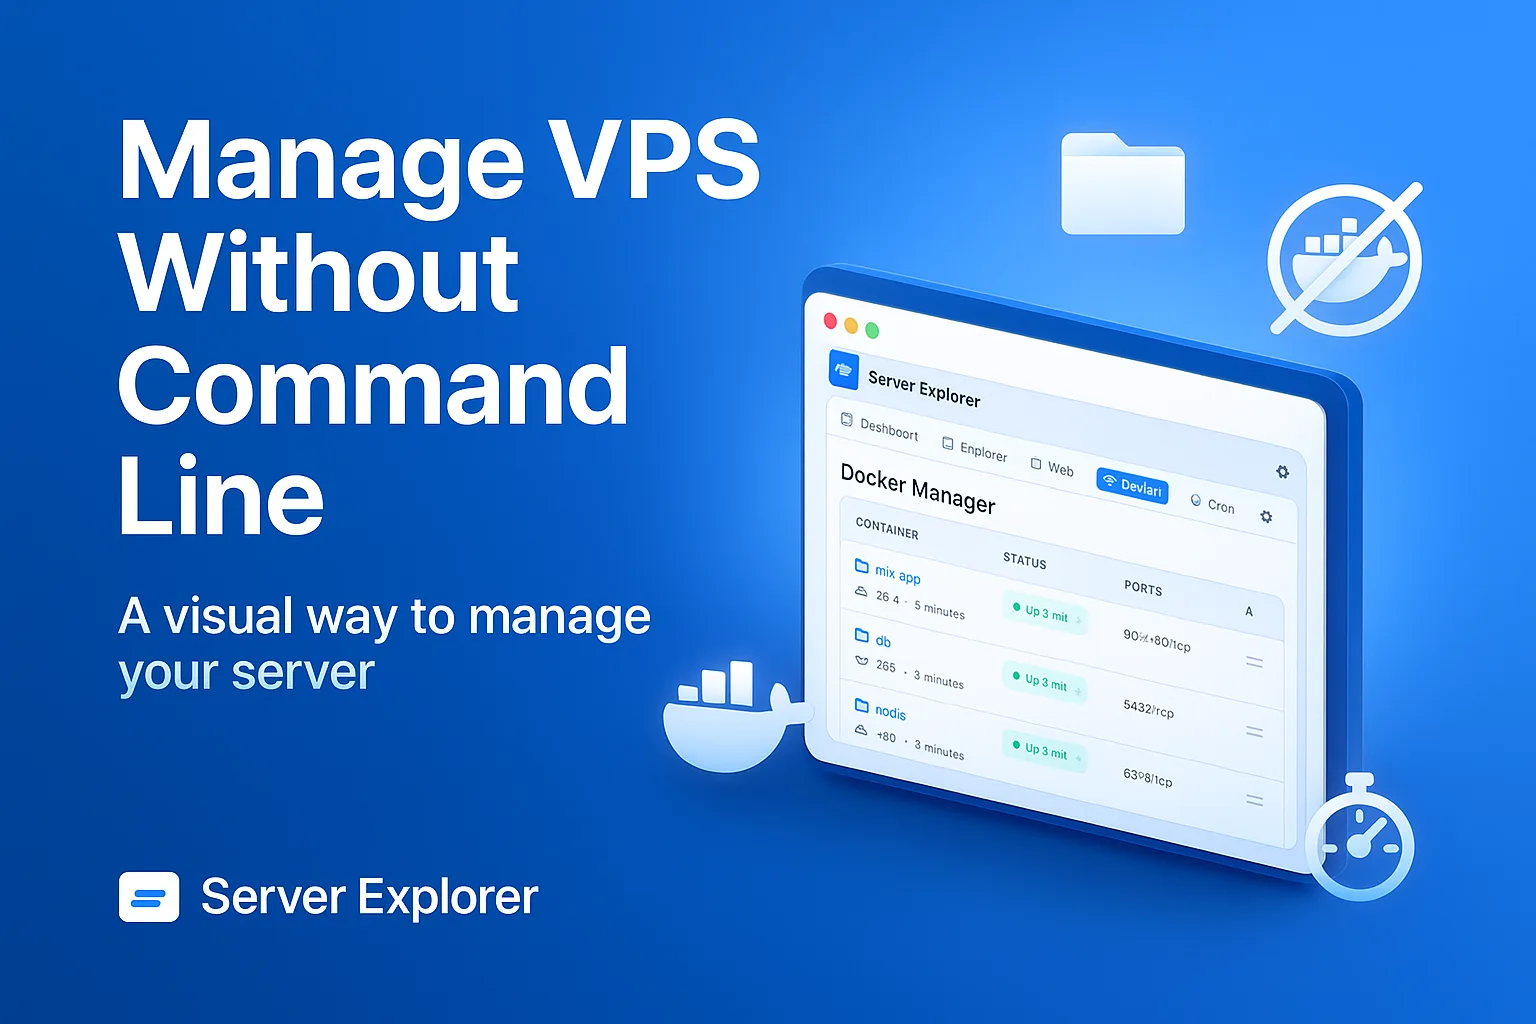
If you want to manage VPS without command line, this guide shows you exactly how to do it using a clean visual interface. You’ll learn how to complete all essential server tasks without typing commands while still keeping full control of your VPS.
What if you could manage your entire VPS with an intuitive visual interface while learning the underlying concepts at your own pace? This comprehensive guide shows you how to handle all essential VPS management tasks without memorizing commands—while still maintaining professional-grade control over your server.
Why Many Users Need to Manage VPS Without Command Line
VPS providers give you incredible power and flexibility at a fraction of traditional hosting costs. But that power comes with a steep learning curve:
What you expected: A simple dashboard where you can manage files, monitor resources, and deploy applications.
What you got:
Copied!Welcome to Ubuntu 22.04.3 LTS user@vps-12345:~$ _
Now you need to remember commands like:
-
ls -lato list files -
cd /var/wwwto navigate -
nano index.htmlto edit files -
systemctl restart nginxto restart services -
topto check resource usage -
docker psto see containers
And that’s just scratching the surface.
The reality: Many developers and entrepreneurs abandon their VPS and go back to expensive managed hosting simply because the command line feels overwhelming.
The solution: You don’t need to choose between power and usability. Modern tools bridge this gap.
What You Can Do When You Manage VPS Without Command Line
Let’s start with what’s actually possible when you manage a VPS visually through Server Explorer:
File Management
- Browse your entire filesystem
- Upload and download files
- Edit configuration files with syntax highlighting
- Create directories and organize content
- Set permissions and ownership
- Search for files across your server
Docker Management
- View all containers and their status
- Start, stop, restart containers
- View live logs
- Browse container filesystems
- Manage images, volumes, and networks
- Load custom Docker images
Process Management (PM2)
- Monitor Node.js applications
- View CPU and memory usage
- Access application logs in real-time
- Restart services
- Check uptime and health
Automation (Cron Jobs)
- Schedule automated tasks visually
- Create backup scripts
- Set up maintenance routines
- Monitor task execution
Monitoring
- Real-time CPU usage
- Memory consumption tracking
- Disk space monitoring
- Network activity
- Service health checks
Security Analysis
- Scan for vulnerabilities
- Review security configurations
- Get actionable improvement recommendations
- Monitor open ports and services
And when you do need the command line? Server Explorer includes an integrated SSH terminal—so you’re never locked out of raw access when you need it.
Getting Started: How to Manage VPS Without Command Line
Step 1: Connect to Your VPS
Traditional way:
Copied!ssh user@your-vps-ip-address # Enter password or configure SSH keys # Remember to use -i flag for key files
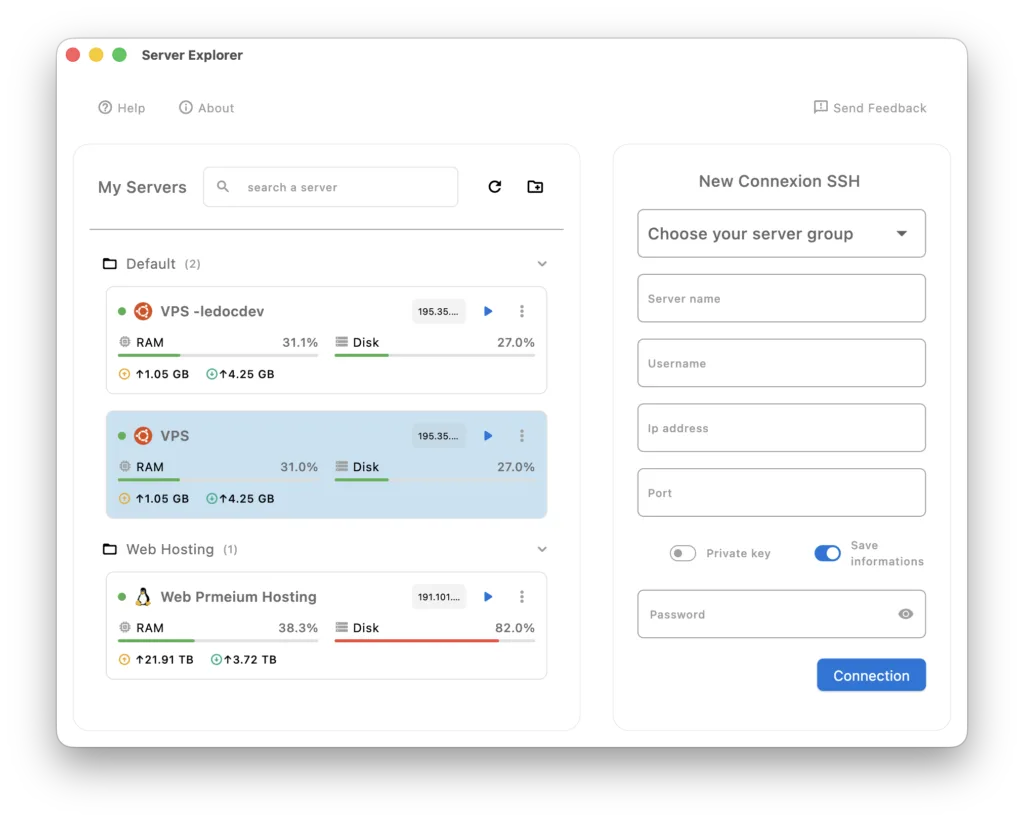
With Server Explorer:
- Launch Server Explorer
- Fil the form on right
- Enter your VPS details:
- Name: “My Production VPS”
- Host: Your VPS IP address (e.g., 123.45.67.89)
- Port: 22 (default SSH)
-
Username: Your SSH user (usually
rootorubuntu) - Authentication: Password or SSH key
- Click “Connect”
That’s it. No terminal. No commands. Just a visual connection.
Managing Your Files Visually
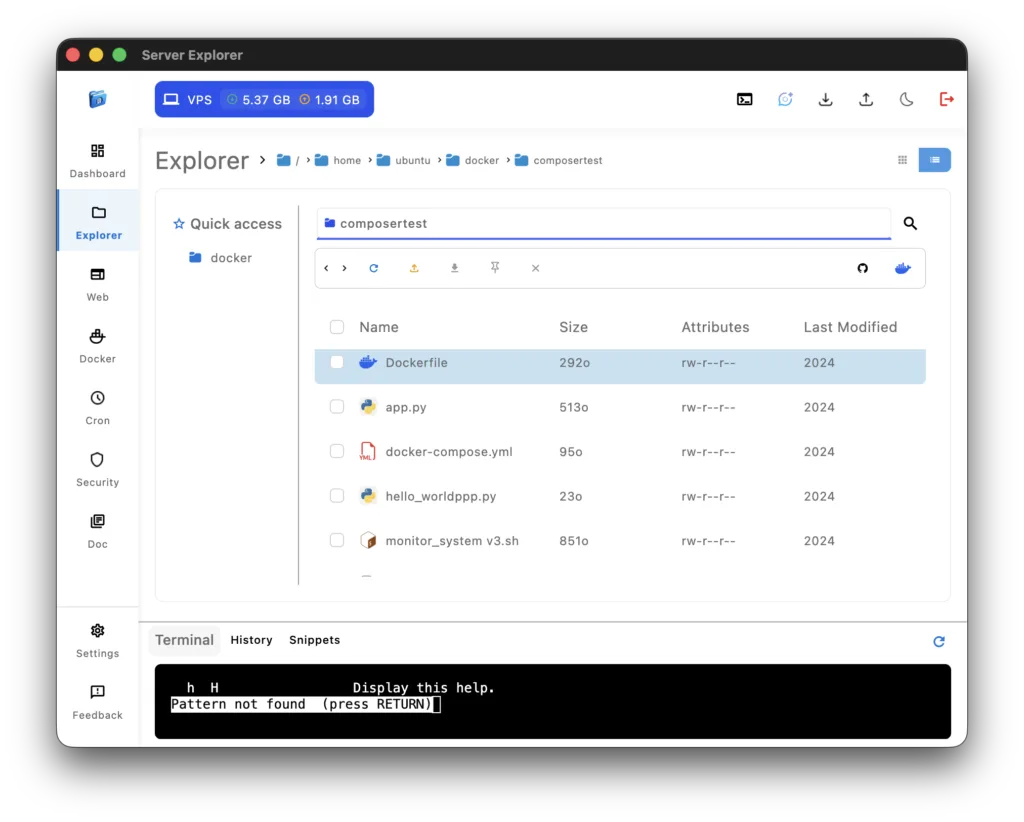
The File Explorer Interface
Once connected, navigate to the Explorer section. You’ll see your server’s filesystem displayed like a local file browser:
- Quick Access on the left for easy navigation
- File list with sizes, permissions, and modification dates
- Quick actions for common operations
- Search functionality to find files instantly
Common File Operations
Editing configuration files:
Instead of:
Copied!sudo nano /etc/nginx/nginx.conf
Simply:
- Navigate to
/etc/nginx/ - Double-click
nginx.conf - Edit in the built-in editor with syntax highlighting
- Save with Ctrl+S
Uploading files:
No need for scp or rsync:
- Navigate to your target directory
- Right click and choose “Import”
- Select files from your computer
- Files transfer automatically via SSH
Setting permissions:
Instead of remembering chmod 755 script.sh:
- Right-click the file
- Select “Modify Permissions”
- Use visual checkboxes for read/write/execute
- Apply changes
Monitoring Your Server Health
Real-Time Resource Monitoring
The Dashboard provides instant visibility into your VPS health:
CPU Usage:
- Current load across all cores
- Historical trends
- Process-level breakdown
Memory:
- RAM usage and available memory
- Swap usage
- Memory-hungry processes identified
Disk Space:
- Total capacity and used space
- Per-partition breakdown
- Growth trends to predict capacity issues
Network:
- Inbound and outbound traffic
- Active connections
- Bandwidth usage
Instead of running top, free -h, df -h, and netstat separately, you see everything in one unified dashboard.
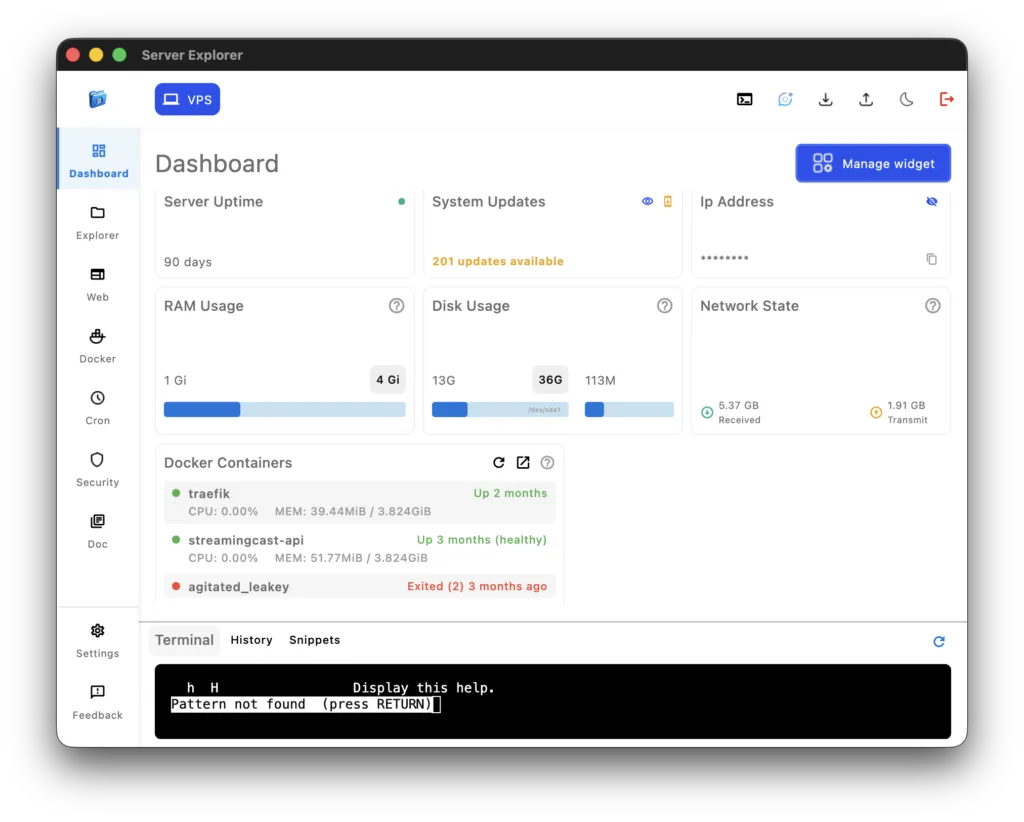
Image 5: Dashboard overview showing CPU, memory, disk, and network metrics
Automating Routine Tasks
Visual Cron Job Management
Server maintenance requires automation. With Server Explorer’s Cron section, you can schedule tasks without editing crontab:
Example: Daily backups
Traditional way:
Copied!crontab -e # Add: 0 2 * * * /home/user/backup.sh
Visual way:
- Go to Cron section
- Click “+ New”
- Select your backup script with the file picker
- Choose “Every day” from presets
- Set time to 2:00 AM
- Click “Schedule”
The interface validates your schedule and prevents syntax errors.
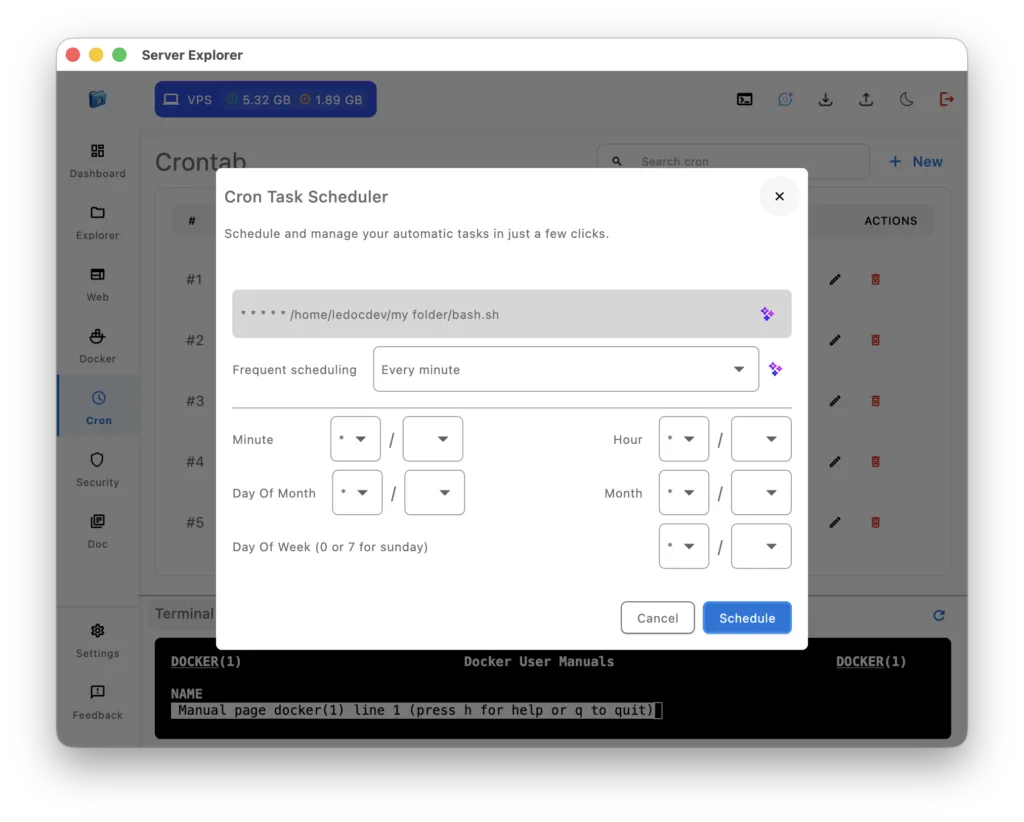
Image 6: Cron job scheduler interface with frequency selection
Security Without the Guesswork
Built-in Security Scanner
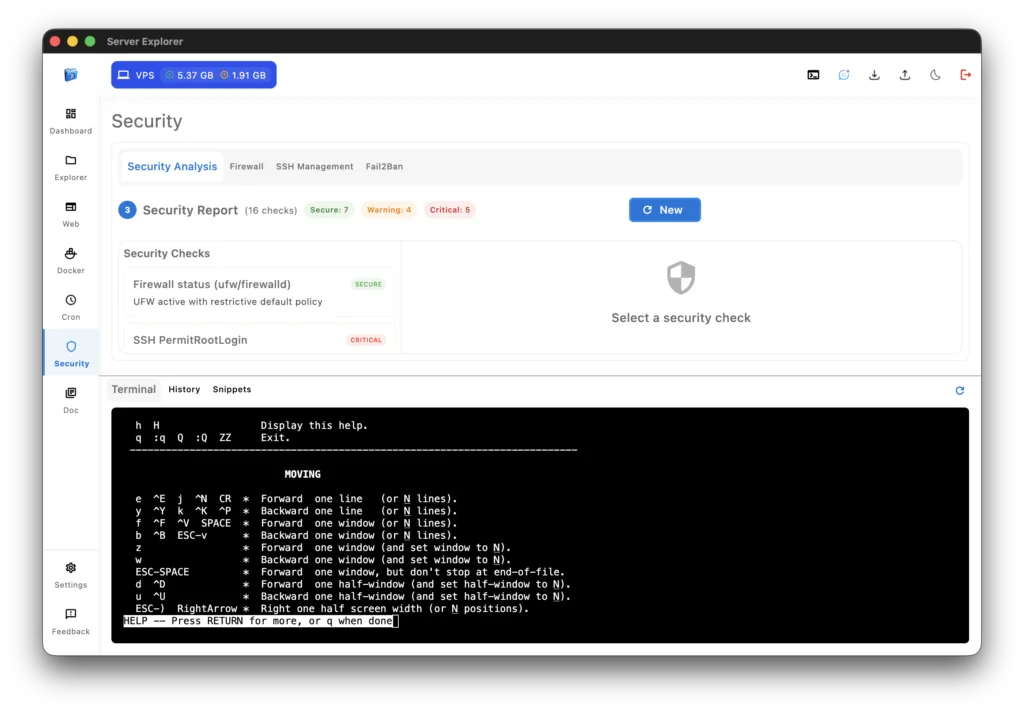
The Security section analyzes your VPS and provides actionable recommendations:
What it checks:
- SSH configuration (password authentication, root login)
- Firewall status and rules
- Open ports and services
- System updates and patches
- User permissions and sudo access
- File permissions on critical directories
Instead of manually running:
Copied!sudo ufw status sudo ss -tulpn sudo grep PermitRootLogin /etc/ssh/sshd_config sudo apt list --upgradable
You get a comprehensive security report with:
- ✅ What’s configured correctly
- ⚠️ What needs attention
- 🔴 Critical issues requiring immediate action
- 📋 Step-by-step remediation guides
Security Best Practices for Visual Management
Even with visual tools, security fundamentals matter:
1. Use SSH Keys, Not Passwords
Why: Password authentication is vulnerable to brute-force attacks.
How with Server Explorer:
- Generate SSH key on your local machine
- Add it to your VPS (use terminal or VPS provider dashboard)
- Configure Server Explorer to use the key file
- Disable password authentication on VPS
2. Keep Your VPS Updated
Use the integrated terminal monthly:
Copied!sudo apt update && sudo apt upgrade -y
Or schedule it with a cron job via the visual interface.
3. Configure Firewall
Use UFW (Uncomplicated Firewall):
Copied!sudo ufw allow 22 # SSH sudo ufw allow 80 # HTTP sudo ufw allow 443 # HTTPS sudo ufw enable
Check status visually in the Security section.
4. Regular Backups
Use the Cron scheduler to automate:
- Database exports
- Configuration backups
- File system snapshots
Remember: Backups you can’t restore are worthless. Test them regularly.
Choosing Your VPS Provider
Server Explorer works with any VPS accessible via SSH. Popular providers:
- Beginner-friendly
- Excellent documentation
- Predictable pricing
- 1-click apps available
- Great performance
- Competitive pricing
- Strong support
- Good for production
- Global locations
- High-frequency compute options
- Flexible pricing
- Bare metal available
- Best price/performance ratio
- European focus
- Auction servers for deals
- Strong privacy stance
All work perfectly with Server Explorer. Choose based on your location, budget, and specific needs.
Getting Started Checklist
Ready to manage your VPS visually? Follow this checklist:
Before you start:
- Rent a VPS from your chosen provider
- Receive SSH credentials (IP, username, password/key)
- Download and install Server Explorer
Initial setup:
- Connect Server Explorer to your VPS
- Explore the filesystem via Explorer section
- Check server resources in Dashboard
- Open integrated Terminal and run
ls -lato confirm access
Essential configurations:
- Update system packages:
sudo apt update && sudo apt upgrade - Configure firewall (UFW)
- Set up SSH key authentication
- Disable root password login
- Schedule automatic backups via Cron
Deploy your first project:
- Upload files via Explorer or clone via Terminal
- Install required software (Node.js, Docker, etc.)
- Start your application (PM2 or Docker)
- Monitor resource usage in Dashboard
- Configure automated tasks with Cron

Server Explorer
Manage your servers with just a few clicks. Replace complex command-line operations with an intuitive interface, while maintaining the performance and security of traditional SSH access.
Conclusion: VPS Power Without Terminal Overwhelm
Virtual Private Servers offer incredible value, performance, and flexibility. But the command-line learning curve prevents many from taking advantage of these benefits.
You shouldn’t have to choose between affordability and usability, or between power and simplicity.
Server Explorer bridges this gap by providing:
- Visual management for daily operations
- Integrated terminal for advanced tasks
- Real-time monitoring and alerts
- Security scanning and recommendations
- Gradual command-line education
- Professional-grade control without memorization
The result? You can:
- Start with zero terminal experience
- Manage production servers confidently
- Learn Linux gradually and naturally
- Scale from hobby projects to professional deployments
- Save hundreds of dollars annually on hosting
Your VPS doesn’t have to be intimidating. With the right tools, it’s as manageable as shared hosting—but infinitely more powerful.
Ready to take control of your server? Try Server Explorer today and discover VPS management without the command-line overwhelm.
Pro tip: Server Explorer’s integrated terminal lets you run these commands while seeing visual context—making them easier to understand and remember.